The Ultimate Guide to Houseplant Propagation
Hey there, plant parents and green thumbs in the making! Ready to turn your humble houseplant into a flourishing family? That's what propagation is all about!
Propagation is like giving your plants superpowers to multiply.
Unlike reproduction, which involves flowers, fruits, and seeds, propagation is a way to create new plants from parts of existing ones. It's like cloning, but way cooler and totally legal in the plant world!
Why should you give propagation a go?
- It's a budget-friendly way to expand your indoor jungle
- You can share your love of plant ❤️🌱 with friends and family
- There's an indescribable joy in watching a tiny cutting grow into a full-fledged plant
- It's a great way to save a struggling plant by creating healthy offshoots
So, let's dive in and uncover the secrets of plant propagation!
To know what propagation method is best for your plant, browse and search your plant to know more about what she likes.
Tools needed for propagation
Before we get our hands dirty, let's gather our plant propagation toolkit:
- Sharp scissors or pruners

It's important for making a clean cut on the stem or roots, and a good investment for any true gardener!
- Clean pots with drainage holes (if you will propagate in soil)
- Water: to hydrate your cuttings (or to place them in for water propagation) best water is rain water!
- Well-draining potting mix (if you will propagate in soil)
To have more information on this mix and learn how to create it try our substrate guide.
- Rooting hormone: Speeds up root development (optional, but it's like a growth booster for your cuttings)
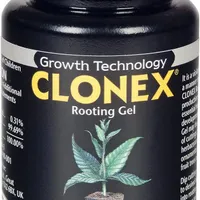
I personnaly use rooting gel as it's easier to apply and can also be used in water.
- Clear plastic bags or humidity domes: Useful for maintaining a humid environment and to create a mini-greenhouse effect
Pro tip on cleanliness
Always clean your tools before and after use. A quick wipe with rubbing alcohol will do the trick. This prevents the spread of any unwanted plant cooties!
Too choose between water or soil propagation you can look at our water propogation VS soil propagation section.
Common and easy propagation methods
This is the petiole attaching the leaf to the stem.
That's a node.
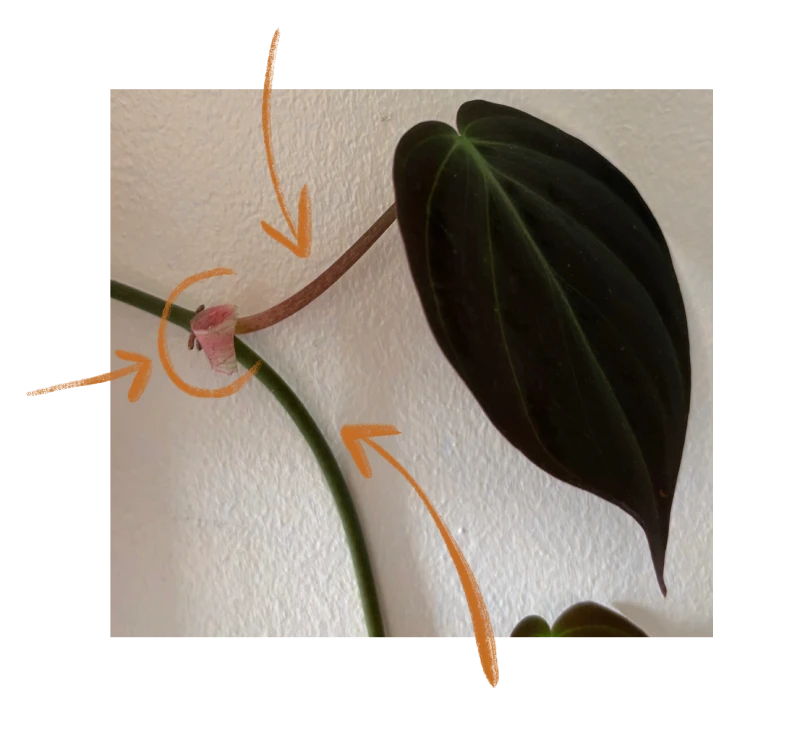
This is the stem of the plant.
Stem or tip cutting
One of the most popular and easiest ways to propagate many plants is by taking a stem or tip cutting, which involves snipping off a healthy section to grow a whole new plant.
Best suited for plants with soft, herbaceous stems or woody branches.
Step by step:
- Choose a healthy stem. More nodes is better!
- Make a clean cut just below a node at a 45-degree angle.
- Remove the lower leaves, leaving some at the top.
- (Optional) Dip the cut end in rooting hormone.
- Place the cutting in water or moist soil.
- (optional) Cover with a dome or clear plastic bag to maintain humidity.
- 💧 Keep the soil always humid.
Roots will typically develop in 2-6 weeks. Make sure to change water weekly if you are propagating in water.
Example:
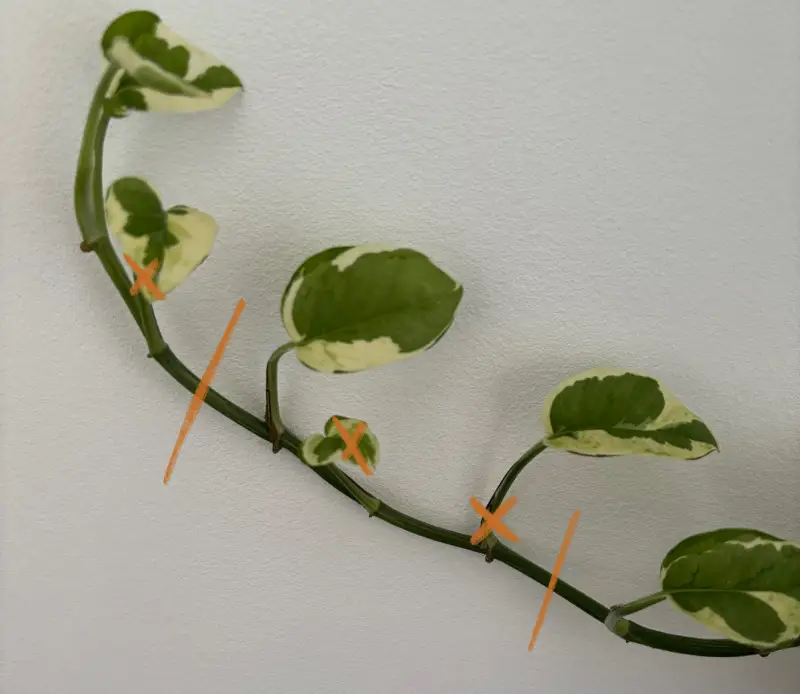
On this plant I can try to make two propagation, one tip cutting, and another cutting with 3 nodes.
- I can cut on both / indicated.
- The × represent the leafs to remove to maximise the chances of roots.
Leaf cutting
Some plants can be propagated with just a single leaf. This is not the case for all species, and some will never be able to grow from a single leaf!
Step by step:
- Choose a healthy, mature leaf.
- Make a clean cut just below the leaf.
- (For the Sansevieria (now part of the Dracaena genus)) Cut the leaf into sections, ensuring each has a vein.
- Let the cut end callous over for a day to avoid rot.
- Place the leaf or sections in moist soil, cut-side down. If you did not cut the leaf, place it on top of the soil.
- 💧 Water frequently but let the soil dry in between waterings.
It can take several weeks to months for new plants to form.
Leaf with petiole cutting
Similar to leaf cutting, but you keep the leaf stem (petiole) attached to the leaf when propagating. This only works for specific species.
Step by step:
- Choose a healthy leaf with a long petiole.
- Cut the leaf with a few centimeters of petiole.
- Plant the cut end of the petiole in moist soil.
- (optional) Cover with a dome or clear plastic bag to maintain humidity.
- Keep the soil slightly damp.
Roots form in 2 to 4 weeks, new plantlets may appear after a couple of months.
Root cutting
An underground approach to propagation, where you divide healthy roots to bring fresh plants to life from below the surface.
For plants with thick or fibrous root systems that can generate new shoots from a severed root piece.
Step by step:
- Carefully dig up the plant and expose some of the roots.
- Cut off a healthy root section, about 3 inches long.
- Lay the root cutting horizontally on moist soil and cover lightly.
- Keep the soil humid.
New shoots typically emerge in 2-4 weeks.
Classic division
Easy and go-to method for splitting a mature plant into smaller sections, each with roots and shoots.
A perfect method for plants that naturally grow in clumps or form multiple crowns.
Step by step:
- Remove the plant from its pot and gently shake off excess soil.
- Identify natural separation points in the root ball.
- Carefully pull apart or cut the plant into sections, ensuring each has roots and shoots.
- Repot each division in fresh soil.
This method is best done during the plant's dormant season.
This division can stress the plant. It might take a few weeks to adjust. Do not worry if you see brown leafs during this time!
Bulb division
Technique for multiplying bulb based plants by separating offsets from the parent bulb. Best done after flowering.
Step by step:
- Gently dig up the bulb cluster.
- Separate the smaller bulbs from the main bulb.
- Replant each bulb in fresh soil.
Bulbs can take a full season to establish, do not throw them if you don't see any progress!
Offsets or pups division
Offsets, or 'pups,' are mini versions of the parent plant produced by some species. This method remove and replants the baby plants that form around the base of the mother plant.
Step by step:
- Wait until the offset is of good size. The bigger, the hardier!
- Gently separate the offset, ensuring it has some roots. If not, follow the Stem or tip cutting section.
- Plant the offset in its own pot with fresh soil.
New growth can appear within weeks.
Rhizomes and tubers division
Method of cutting through underground stems or storage organs to duplicate your plant.
Ideal for plants with horizontal underground stems or swollen storage organs.
Step by step:
- Dig up the rhizome or tuber.
- Cut into sections, ensuring each has at least one growth point or "eye".
- Allow cut surfaces to dry for a day.
- Plant each section in fresh soil.
Best done at the start of the growing season.
New shoots may take months to appear. Everything is happening underground!
Stolon or runner division
All about encouraging some species natural spreading tendency by separating the long, creeping shoots produced by your plant.
This is similar to the Serpentine layering technique.
Step by step:
- Identify a healthy runner with developed leaves.
- Pin the runner to moist soil while still attached to the mother plant using bent wire or small rocks.
- Once roots develop, cut the runner from the mother plant.
- Transplant the new plant to its own pot.
Roots form quickly due to the runner still being attached to the mother plant, often within days to weeks.
Air layering
Layering involves encouraging a stem to root while it’s still attached to the parent plant.
Great for woody plants with thick stems that are difficult to root through other methods.
Step by step:
- Choose a healthy stem and remove leaves from a 4 inches section.
- Make a small upward cut in the bark.
- Apply rooting hormone to the cut.
- Wrap the area with moist sphagnum moss and cover with plastic wrap.
- Once roots are visible, cut below the rooted area and pot up.
Roots typically form in 1 to 3 months.
Serpentine layering
Rooting multiple sections of a long, flexible stem by bending it into the soil at several points.
Used for vining plants.
Step by step:
- Choose a long, flexible stem.
- (optional) Make small wounds at intervals along the stem.
- Pin these wounded sections into the soil using bent wire or small rocks while leaving some sections above ground.
- Once roots form, cut the stem between rooted sections.
Can take several weeks to months depending on the plant.
Mound layering
Encouraging multiple stems to root by mounding soil around the base of the plant.
Ideal for plants with stems that sprout roots when buried in soil.
Step by step:
- Mound soil around the base of the plant, leaving the tips exposed.
- Roots will develop under the mound.
- Once roots form, carefully dig up and separate the rooted shoots.
Roots typically form over one growing season.
Aftercare and transplanting
Congratulations! You finished propagating, what now?
- Patience is key: Some plants root quickly, others take their sweet time. Don't give up!
- Maintain humidity: Use clear plastic bags or domes to create a mini-greenhouse effect.
- Provide good light conditions: Bright, indirect light is best for most propagations.
- Keep soil moist but not waterlogged: Overwatering is a common propagation mistake.
- Gradually acclimate: Once roots have developed, slowly introduce your new plant to normal conditions where you expect it to stay.
When roots are well-developed (usually 2 inches long for water propagation), or whenever you feel like the plant is growing greatly when in soil: it's time to transplant!
- Prepare a slightly bigger pot with fresh, adequate soil for your plant.
- Gently plant your rooted cutting, being careful not to damage the delicate roots.
- Water thoroughly and place in a spot with appropriate light.
- Treat it like a mature plant, but be extra gentle for the first few weeks.
Troubleshooting
Even green thumbs face challenges. Here are some common issues and how to solve them:
- Yellowing leaves: May indicate overwatering or poor lighting. Let the soil dry out more between waterings and try to expose it to more light.
- Mold: Too much humidity or poor air circulation. Remove the humidity dome or plastic bag and try to clean the moldy sections.
- No root developing: Make sure you have a good environment and use rooting hormone if needed.
- Rotting stem or roots: Cut away any mushy parts and try again with a healthy section.
Remember, every failure is a stepping stone to success. Keep trying!
Advanced propagation methods
You can find tons of other propagation techniques in the plant world. Some of them were not included in our earlier sections due to their complexity or the tools required.
Here is a brief section on the most famous ones so that you can flex in front of your plant friends with your tremendous knowledge!
Reproduction
Plants reproduce sexually, through seeds or spores, where genetic material from two parent plants combines to form offspring with traits from both. This process typically involves pollination in flowering plants or spore release in ferns and mosses.
Seeds
Seeds are the most natural form of plant reproduction, where plants produce tiny, often well-protected vessels containing the potential for new life. From flowering plants to fruits and vegetables, many species are grown from seeds. It’s a slower process but highly rewarding for those with patience.
Hybridization
Hybridization involves cross-pollinating two different species or varieties to produce offspring with traits from both parents. This method is commonly used in horticulture to create new plants with desirable characteristics like better flowers, resistance to diseases, or unique colors.
Spores
Spores are the way ferns, mosses, and some fungi reproduce. Instead of seeds, these plants release tiny, dust-like particles that can grow into new plants. It’s a fascinating method for non-flowering plants, though a bit trickier to master since spores require specific conditions to germinate.
Tissue culture (or micropropagation)
Highly advanced method that involves growing plants from very small tissue samples in a sterile environment, usually a lab. This technique is used for almost every mass production of plants today by creating disease-free clones, and preserving rare species. It’s not something you can easily do at home, but it’s essential for commercial nurseries and research.
Grafting (and budding)
Grafting is like plant surgery. You're attaching a piece of one plant (the scion) onto the root system of another plant (the rootstock). It's commonly used in fruit trees but can also be done with some houseplants for unique effects.
Should I use water or soil for my propagation?
When it comes to the medium of propagation, and when both water and soil have their place, you will need to make a decision.
Water propagation is a great method for beginners because it allows you to easily monitor root growth. Watching the roots develop is satisfying, and water propagation works well for many popular houseplants.
- Easy to monitor
- Faster initial development
- Transition to soil will be stressfull for the plant
- Can bring weak roots
Something to remember is that plants does not live soly on water and light. They needs nutriments that are missing in plain water. When this is fine for ealy stage of propagation, you will need to move them to a proper soil at some stage, or provide them with nutriments.
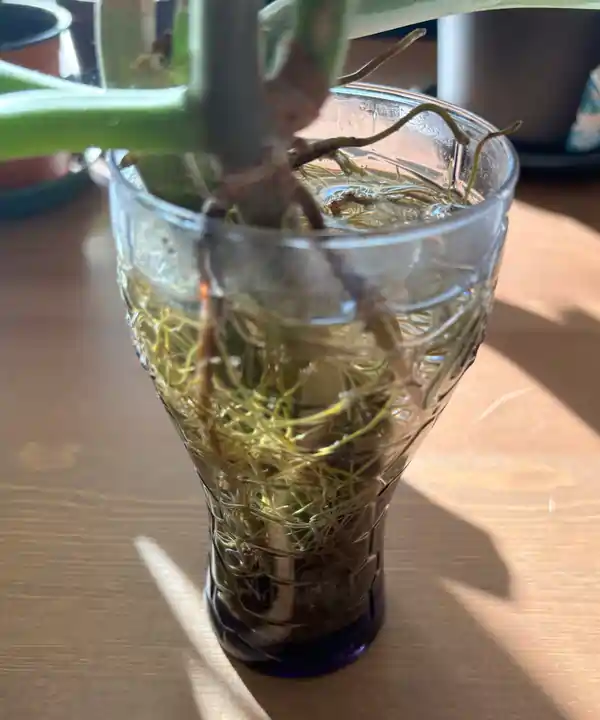
Soil propagation is a more natural method providing stability and the right environment for root development, making this method better suited for plants that are known to be more difficult.
- No transplantation shock and stress
- Stronger and more robust root system
- May take longer than plain water propagation
- More care is required (Keeping the soil humid, etc.)
In the end, both methods can work well depending on your plant and preference. Experiment to find what works best for you and your green friends!
Summary
Whew! We've covered a lot of stuff here. Remember, the key to successful propagation is to try and experiment – every plant and environment is unique. What works for one might not work for another, so keep trying different methods.
And hey, why keep all this plant multiplication fun to yourself? Share your successes and failures with your fellow plant lovers. Join online plant communities, swap cuttings with friends, or start a propagation journal to track your progress.
Remember, every master propagator started as a beginner. So go forth and multiply those plants! Your future babies (and your wallet) will thank you.
Happy propagating!Affiliate products in this page: As an Amazon Associate I earn from qualifying purchases.
